Updated on November 12, 2026 · By the Smart Picks UAE team
Smart Picks UAE is reader-supported. As an Amazon Associate we earn from qualifying purchases, at no extra cost to you. Read our affiliate disclosure.
Quick answer — how to do squats
- Stand with your feet about shoulder-width apart, toes turned out slightly.
- Brace your core, lift your chest and look straight ahead.
- Push your hips back and bend your knees at the same time, as if sitting onto a chair.
- Lower until your thighs are about parallel to the floor, or as low as you can control.
- Keep your heels down and your knees in line with your toes.
- Drive through your whole foot to stand tall, breathing out as you rise.
- Do 2–3 sets of 8–12 reps, two or three times a week.
The squat is one of the most natural movements your body makes. You squat to sit on the sofa, get out of a car or pick up a child, so getting stronger at it pays off well beyond the gym. It is also one of the best exercises you can do at home: no machine, no membership and barely more floor space than a yoga mat. This guide explains how to do squats step by step, the most common form mistakes, a simple progression for beginners and a short home workout you can start today.
This article is general fitness information, not medical advice. If you have knee, hip or back pain, are pregnant or have a medical condition, check with a qualified clinician before starting a new exercise routine.
What Is a Squat?
A squat is a lower-body exercise in which you bend at the hips, knees and ankles together to lower your body, then stand back up. The basic version uses only your bodyweight and is often called an air squat or bodyweight squat. Once you can do it well, you can make it harder with resistance bands, a kettlebell, dumbbells or, in a gym, a barbell.
Unlike the kettlebell swing, which is a hip hinge where the hips do most of the moving, the squat bends the knees and hips more evenly. That is why it trains the front of the thighs more, and why the two exercises pair so well in one routine.
How to Do Squats: Step-by-Step
Health organisations such as the Cleveland Clinic and Mayo Clinic describe the basic squat in very similar terms. Here is the same technique broken into seven simple steps.
1. Set your feet
Stand with your feet about shoulder-width apart, or slightly wider. Turn your toes out a little, roughly 10–30 degrees, whatever feels natural for your hips. Spread your weight across the whole foot: heel, big toe and little toe.
2. Brace and lift your chest
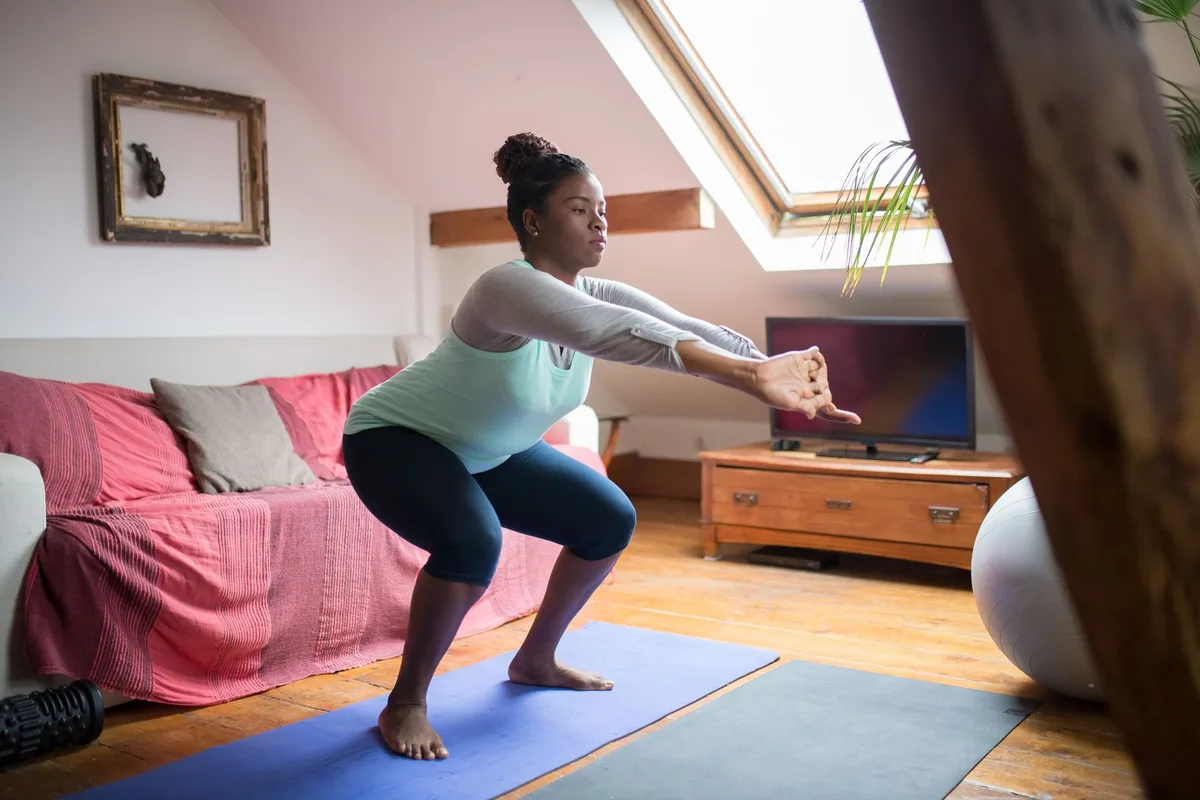
Take a breath into your belly and tighten your stomach as if you were about to be poked. Lift your chest, keep your shoulders relaxed and look straight ahead. Stretch your arms out in front of you or clasp your hands at chest height; this acts as a counterbalance.
3. Sit back and down
Start the movement by pushing your hips back and bending your knees at the same time, as if you were sitting onto a chair behind you. Your torso will lean forward slightly; that is normal and helps you stay balanced.
4. Track your knees over your toes
As you lower, let your knees travel in the same direction as your toes. They should not collapse inward or flare far outward. Some forward knee travel past the toes is fine for most people in a deeper squat.
5. Find your depth
Lower until your thighs are about parallel to the floor, or as far as you can go while your heels stay down and your back stays neutral. If you cannot reach parallel yet, that is fine; Mayo Clinic advises simply going as low as you can and building depth over time.
6. Drive up
Push through your whole foot to stand back up, keeping your chest up and your knees in line. Squeeze your glutes at the top without leaning back. Breathe out as you rise.
7. Reset and repeat
Pause briefly at the top, check your stance, then start the next rep. Aim for smooth, controlled reps: about two to three seconds down and one to two seconds up.
Proper Squat Form: The Checklist
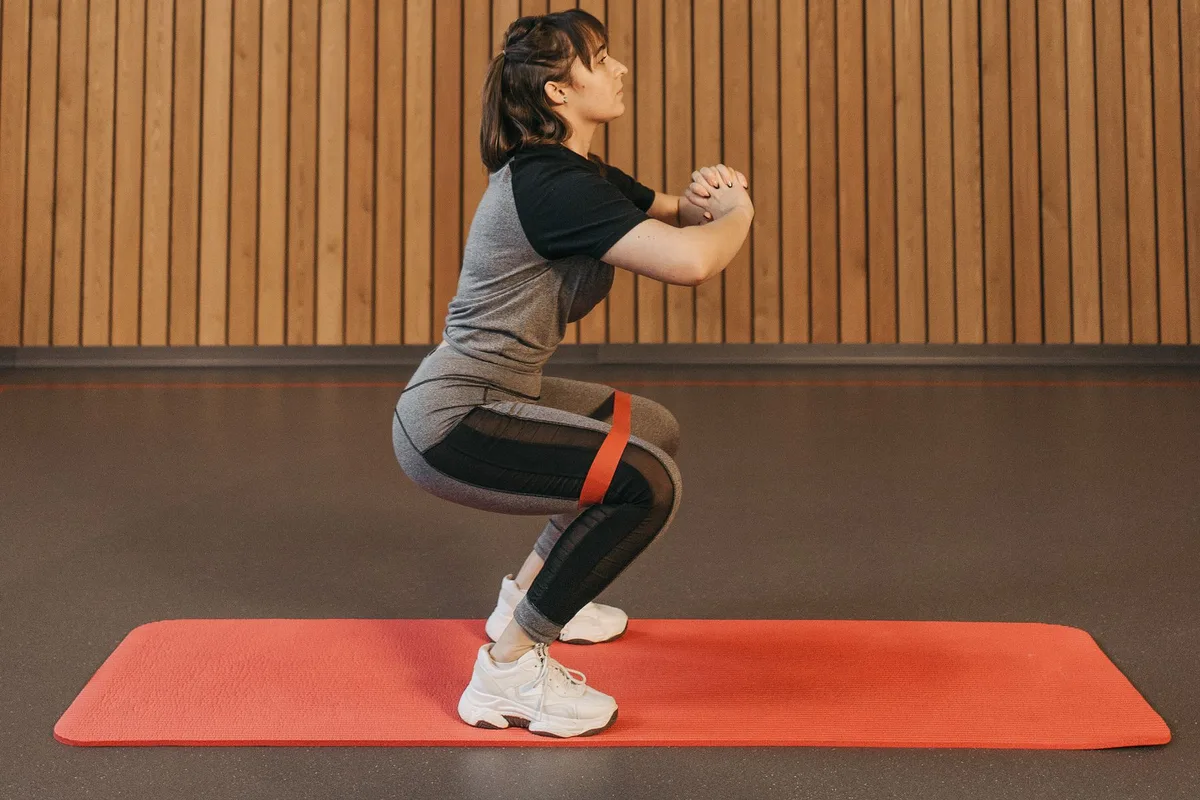
Proper squat form is easier to check than to describe. Prop your phone on a shelf, film a set from the side and from the front, and compare it with this list:
- Feet flat: heels stay on the floor for the whole rep.
- Knees in line: from the front, the knees follow the second or third toe.
- Neutral spine: the back stays long, with no rounding at the bottom and no big arch at the top.
- Chest up, eyes forward: looking at the floor tends to pull the chest down.
- Controlled depth: you go only as low as you can while keeping the points above.
- Even pressure: you feel the work in the thighs and glutes, not mainly in the lower back or knees.
Common squat mistakes and how to fix them
| Mistake | What it looks like | Fix |
|---|---|---|
| Knees caving in | Knees drift toward each other, especially on the way up | Think “spread the floor”; a mini band above the knees gives useful feedback |
| Heels lifting | Weight rolls onto the toes | Keep the whole foot planted; widen the stance slightly or squat to a chair |
| Rounded back | Chest drops and the lower back curls at the bottom | Brace your core, keep the chest proud and reduce the depth for now |
| Bouncing at the bottom | Dropping fast and rebounding out of the hole | Lower for a slow count of two or three and control the turnaround |
| Only bending the knees | Hips stay forward and the knees shoot ahead | Start the movement by sending the hips back at the same time as the knees bend |
| Holding your breath the whole set | Face goes red, you feel dizzy | Breathe in on the way down and out as you stand up |
If you notice two or three of these at once, step back to the chair squat in the progression below. It sets a consistent depth and lets you rebuild the pattern with less effort.
Squats for Beginners: A Simple Progression
Squats for beginners work best when you start easier than you think you need to. The progression below moves from a supported chair squat to a loaded goblet squat. Stay at each stage for at least a week or two, and drop back a stage whenever your form slips or something hurts.
| Stage | Exercise | Starting volume | Move on when |
|---|---|---|---|
| 1 | Chair (box) squat — sit down lightly and stand back up | 2–3 × 8–10 | 12 smooth reps without using your hands |
| 2 | Bodyweight squat to parallel or your comfortable depth | 3 × 10–12 | 15 reps with heels down and knees tracking |
| 3 | Pause squat — hold the bottom for 2–3 seconds | 3 × 8 | Every pause feels stable, not wobbly |
| 4 | Banded squat — mini band just above the knees | 3 × 12 | You can push the knees out against the band on every rep |
| 5 | Goblet squat — kettlebell or dumbbell at the chest | 3 × 8–12 | Increase the weight once 12 reps feel controlled |
For stage 4, a fabric hip band such as the Tribe Lifting fabric resistance bands stays in place above the knees better than thin latex loops and gives clear feedback if your knees start to cave. For stage 5, a single cast iron kettlebell like the PROIRON cast iron kettlebell is easy to hold at the chest by the horns and doubles up for swings. If you are not sure which weight to buy, our guide to the best kettlebell for home workouts has a beginner weight table.
How to do a goblet squat
Hold a kettlebell or one dumbbell vertically against your chest, elbows pointing down. Squat exactly as above, letting your elbows travel inside your knees at the bottom. The weight in front acts as a counterbalance, so many beginners find they can sit deeper and stay more upright in a goblet squat than in a bodyweight squat.
Squats Muscles Worked
When people search for squats muscles worked, the short answer is: almost everything below the waist, plus your core. The main muscles are:
- Quadriceps: the four muscles at the front of the thigh straighten the knee as you stand up.
- Glutes: they extend the hip, especially as you drive out of the bottom of a deeper squat.
- Adductors: the inner-thigh muscles help extend the hip and keep the knees stable.
- Hamstrings and calves: they assist and stabilise the knee and ankle.
- Core and lower back: they hold your trunk upright and stiff under load.
A wider stance with the toes turned out tends to involve the adductors and glutes a little more; a narrower stance shifts a bit more work to the quads. For a general home routine, a shoulder-width stance works well.
Benefits of Squats
- Everyday strength: getting up from the floor, climbing stairs and lifting shopping all use the squat pattern.
- Stronger legs and glutes: squats build muscle in the largest muscle groups of the body.
- Joint health and mobility: controlled squats strengthen the muscles around the knees and hips and keep ankles and hips moving through a full range.
- Calorie burn: working big muscles raises your heart rate, which helps when combined with other full-body exercises for weight loss.
- No equipment needed: you can train anywhere, any time.
Squats alone will not spot-reduce fat from your thighs or belly. Results come from regular training, sensible eating and enough protein per day to support muscle.
How to Do Squats at Home: A 20-Minute Workout
Knowing how to do squats at home is mostly about making the most of limited space and equipment. This session needs only a mat and, if you have one, a mini band. Do it two or three times a week on non-consecutive days.
- Warm-up (5 minutes): march on the spot for a minute, then 10 hip circles each way, 10 glute bridges, 10 slow bodyweight squats to a chair and 10 alternating reverse lunges.
- Main circuit (12 minutes): 3 rounds of 12 bodyweight or banded squats, 10 push ups (on a counter or knees if needed), 8 split squats per leg and a 30-second plank. Rest 60–90 seconds between rounds.
- Finisher (3 minutes): a 30-second wall sit, 30 seconds rest, repeated three times.
To progress, add two reps per exercise each week, then move to banded or goblet squats. If you also have a door frame bar, add pull-up progressions for a balanced full-body plan, or use the moves in our beginner dumbbell exercises list.
Set up your space
A firm, non-slip floor is best for squats. A good mat such as the PROIRON non-slip yoga mat is comfortable for warm-ups and floor work; because it is thick, some people prefer to squat with their feet on the floor beside it for better stability. Keep a clear area about two metres square, wear flat shoes or train barefoot, and keep water nearby. In the UAE summer, train in an air-conditioned room or early in the morning; our guide to exercising in the UAE heat has more tips. For more ideas on fitting kit into a small flat, see our home gym equipment for apartments guide.
Squat Variations to Try Next
- Sumo squat: a wide stance with toes turned out; more inner-thigh and glute work.
- Split squat: one foot forward, one back; trains each leg on its own and improves balance.
- Bulgarian split squat: rear foot on a sofa or bench; a tough single-leg exercise that needs no weights.
- Wall sit: hold a squat with your back against a wall; useful when knees are sensitive to movement.
- Jump squat: a powerful version for conditioning; only add it once regular squats feel solid.
- Band squat with loops: latex loop bands such as the PROIRON resistance loop bands come in several strengths, so you can progress gradually; see our resistance bands guide for more options.
Helpful Gear for Squats at Home
- Tribe Lifting fabric resistance bands — cloth hip bands that stay put above the knees and are good for banded squats and glute work.
Check Price on Amazon → - PROIRON resistance loop bands (set of 5) — cheaper latex loops in several strengths; they can roll up on bare legs, so wear leggings.
Check Price on Amazon → - PROIRON cast iron kettlebell — one solid bell covers goblet squats now and kettlebell swings later.
Check Price on Amazon → - PROIRON non-slip yoga mat — thick and cushioned for warm-ups, planks and floor work; a firm floor is steadier for heavier squats.
Check Price on Amazon →
FAQ
How do you do squats properly as a beginner?
Stand with your feet about shoulder-width apart and toes turned out slightly. Push your hips back and bend your knees at the same time, keep your chest up and heels down, and lower until your thighs are about parallel to the floor or as far as you can control. Drive through your whole foot to stand up. Start with 2–3 sets of 8–12 reps.
How many squats should a beginner do a day?
You do not need to squat every day. Two or three sessions a week of 2–3 sets of 8–15 controlled reps is a sensible start. Mayo Clinic notes that for many people one set of 12–15 repetitions is adequate at first. Add sets or reps gradually as long as your form stays the same.
Is it okay if my knees go past my toes when I squat?
For most people, yes. In a deep squat some forward knee travel is normal, especially if you have long thighs. What matters more is that your knees follow the line of your toes and do not cave inward, and that the movement feels comfortable. If you have a knee problem, follow your physiotherapist’s advice.
Can I do squats at home without equipment?
Yes. Bodyweight squats, chair squats, wall sits, split squats and pause squats need no equipment. When they get easy, add a resistance band above the knees, hold a backpack or water bottles, or use a kettlebell for goblet squats.
What muscles do squats work?
Squats mainly work the quadriceps at the front of the thighs and the glutes. The adductors (inner thighs), hamstrings and calves assist, and the core and lower-back muscles keep your trunk stable throughout the movement.
Why do my knees hurt when I squat?
Common causes are knees caving inward, the heels lifting so weight shifts onto the toes, squatting deeper than you can control, or doing too much too soon. Reduce the depth, squat to a chair, slow down and check your alignment. Sharp or lasting pain needs a check from a qualified clinician.
The Bottom Line
Learning how to do squats comes down to a few simple cues: feet planted, chest up, hips back and down, knees following the toes, and stand up tall. Start with chair squats, add depth and reps slowly, and use bands or a kettlebell only when bodyweight reps feel easy. Two or three short sessions a week at home are enough to build stronger legs and glutes and make everyday movement easier.